style config about zsh | bash | tmux
December 16, 2023
C X

Camille X
Life style
1 / 5 Parts
A guide on how to use this sveltekit + markdown blog.
Series
1. from termcolor import colored
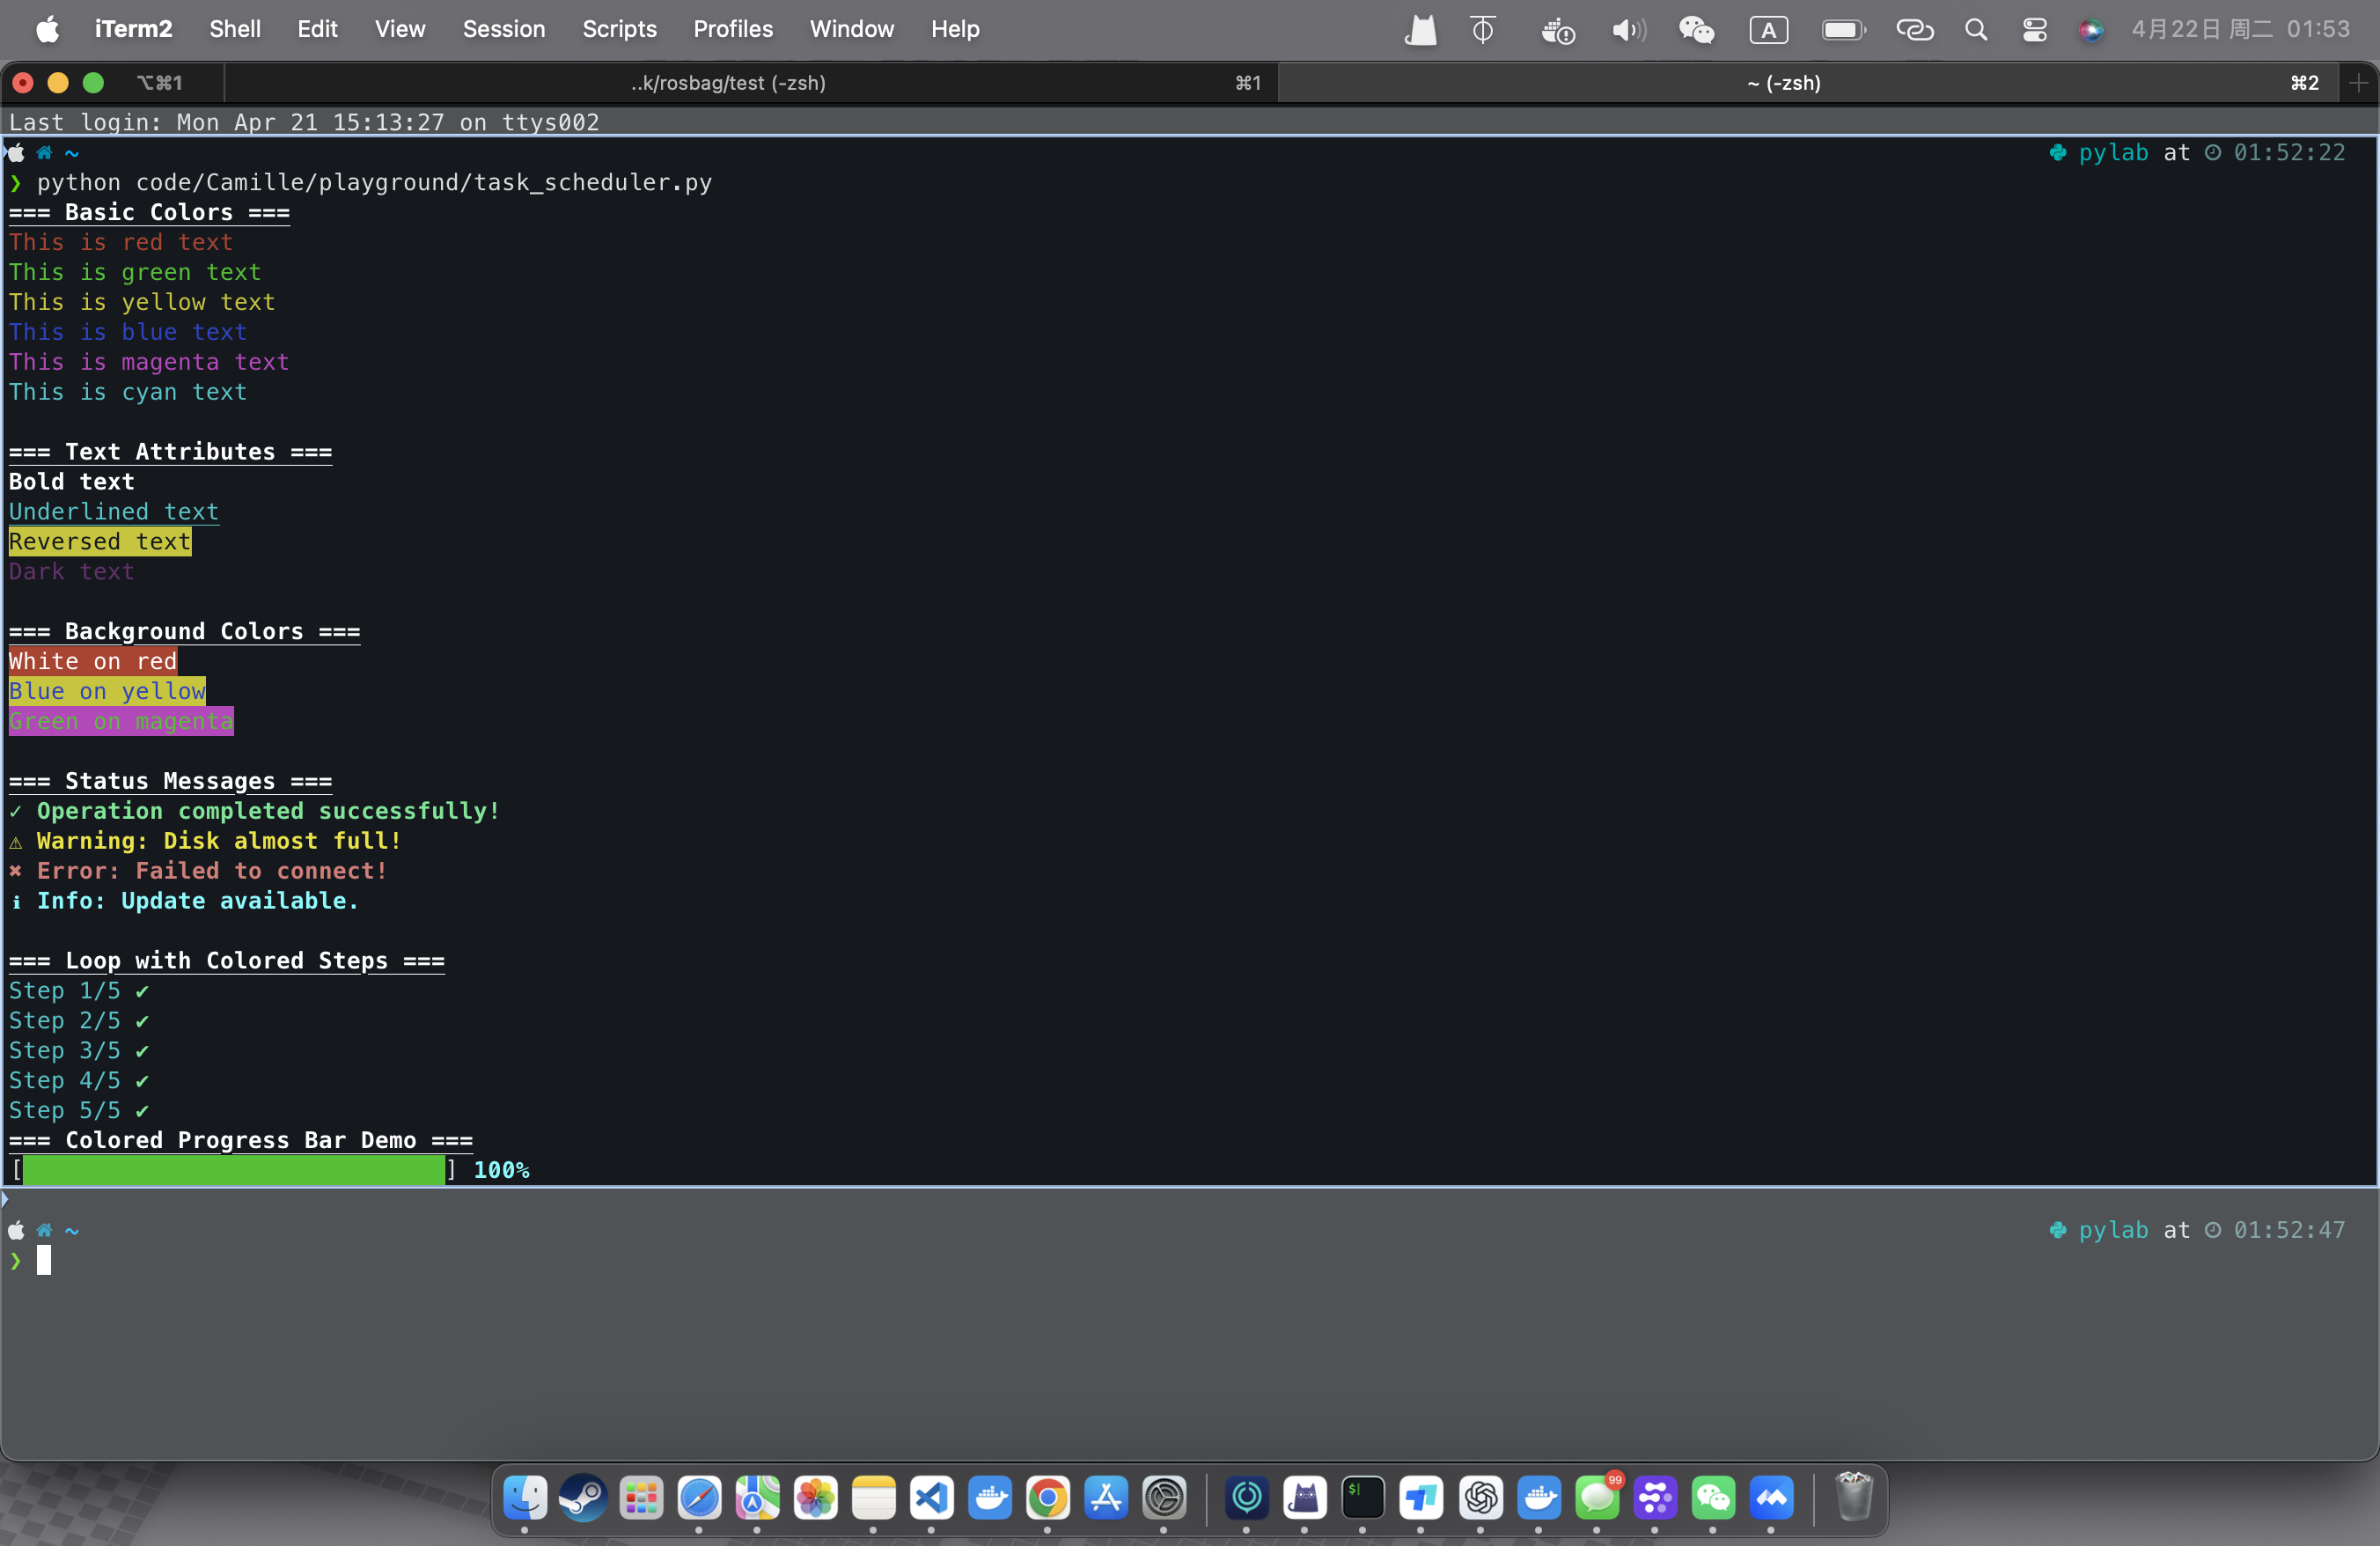
🎨 用 termcolor 给终端输出加点颜色!
在日常写脚本或调试程序时,想不想让你的终端输出更醒目、更有层次感?termcolor 是一个轻量又实用的 Python 库,可以轻松为终端文字加上颜色、高亮、下划线、背景色等效果。
本篇展示了 termcolor.colored 的几个经典用法,包括: • ✅ 基本颜色输出 • ✨ 加粗、下划线、反显等文本属性 • 🌈 前景 + 背景颜色搭配 • ⚠ 状态信息彩色提示(成功/失败/警告) • 🔁 带颜色的进度循环演示
只需几行代码,就能让你的 CLI 输出瞬间焕然一新!
			from termcolor import colored
import sys, time
def demo_basic_colors():
    print(colored("This is red text", "red"))
    print(colored("This is green text", "green"))
    print(colored("This is yellow text", "yellow"))
    print(colored("This is blue text", "blue"))
    print(colored("This is magenta text", "magenta"))
    print(colored("This is cyan text", "cyan"))

def demo_text_attributes():
    print(colored("Bold text", "white", attrs=["bold"]))
    print(colored("Underlined text", "cyan", attrs=["underline"]))
    print(colored("Reversed text", "yellow", attrs=["reverse"]))
    print(colored("Dark text", "magenta", attrs=["dark"]))

def demo_background_colors():
    print(colored("White on red", "white", "on_red"))
    print(colored("Blue on yellow", "blue", "on_yellow"))
    print(colored("Green on magenta", "green", "on_magenta"))

def status_msg(msg, status):
    color = {
        "success": "green",
        "error": "red",
        "warning": "yellow",
        "info": "cyan"
    }.get(status, "white")
    return colored(msg, color, attrs=["bold"])

def demo_status_messages():
    print(status_msg("✓ Operation completed successfully!", "success"))
    print(status_msg("⚠ Warning: Disk almost full!", "warning"))
    print(status_msg("✖ Error: Failed to connect!", "error"))
    print(status_msg("ℹ Info: Update available.", "info"))

def demo_loop_with_colors():
    for i in range(1, 6):
        print(colored(f"Step {i}/5", "cyan"), colored("✔", "green", attrs=["bold"]))

def color_progress_bar(progress, total, bar_length=30):
    percent = float(progress) / total
    filled_len = int(round(bar_length * percent))

    bar = colored("█" * filled_len, "green") + colored("-" * (bar_length - filled_len), "white")
    percent_text = colored(f"{int(percent * 100)}%", "cyan", attrs=["bold"])

    sys.stdout.write(f"\r[{bar}] {percent_text}")
    sys.stdout.flush()

def demo_progress():
    total = 50
    for i in range(total + 1):
        color_progress_bar(i, total)
        time.sleep(0.05)
    print()  # 换行
if __name__ == "__main__":
    print(colored("=== Basic Colors ===", "white", attrs=["bold", "underline"]))
    demo_basic_colors()
    print()

    print(colored("=== Text Attributes ===", "white", attrs=["bold", "underline"]))
    demo_text_attributes()
    print()

    print(colored("=== Background Colors ===", "white", attrs=["bold", "underline"]))
    demo_background_colors()
    print()

    print(colored("=== Status Messages ===", "white", attrs=["bold", "underline"]))
    demo_status_messages()
    print()

    print(colored("=== Loop with Colored Steps ===", "white", attrs=["bold", "underline"]))
    demo_loop_with_colors()

    print(colored("=== Colored Progress Bar Demo ===", "white", attrs=["bold", "underline"]))
    demo_progress()
运行和调试
- 多进程调试突然出现跳步,是由于其他进程比如 dataloader 开启了多线程 load 数据
MACOS 状态栏间隔调整
			# 1. 缩减图标间距(数值越小越挤,默认通常是 16,建议设为 4 或 6)
defaults -currentHost write -globalDomain NSStatusItemSpacing -int 6

# 2. 缩减图标两边的内边距
defaults -currentHost write -globalDomain NSStatusItemSelectionPadding -int 6

# 3. 重启状态栏(会导致状态栏短暂消失后重现)
killall ControlCenter
			# 1. 缩减图标间距(数值越小越挤,默认通常是 16,建议设为 4 或 6)
defaults -currentHost write -globalDomain NSStatusItemSpacing -int 6

# 2. 缩减图标两边的内边距
defaults -currentHost write -globalDomain NSStatusItemSelectionPadding -int 6

# 3. 重启状态栏(会导致状态栏短暂消失后重现)
killall ControlCenter
ice
常态显示图标/隐藏图标
			# 安装ice
brew install --cask jordanbaird-ice
			# 安装ice
brew install --cask jordanbaird-ice
VS Code 原生就"认得"的注释标记
			# TODO: 这里是待办事项
# FIXME: 这里是需要修复的代码
# BUG: 这里是已知的错误
# HACK: 这里是临时解决方案
# NOTE: 这里是一些重要的备注
# XXX: 这里是需要特别注意的地方
			# TODO: 这里是待办事项
# FIXME: 这里是需要修复的代码
# BUG: 这里是已知的错误
# HACK: 这里是临时解决方案
# NOTE: 这里是一些重要的备注
# XXX: 这里是需要特别注意的地方
ffmpeg
单个文件压缩命令示例
ffmpeg -i /Users/calmzeal/master/实验记录/0606_1.mov -stats -vcodec libx264 -crf 28 -preset veryfast /Users/calmzeal/master/实验记录/0606_1_compressedByffmpeg.mp4
ffmpeg -i /Users/calmzeal/master/实验记录/0606_1.mov -stats -vcodec libx264 -crf 28 -preset veryfast /Users/calmzeal/master/实验记录/0606_1_compressedByffmpeg.mp4
批量压缩大于 100M 的视频文件(mp4/mov)
			# 不自动删除原始大文件(可选),可能循环压缩新文件
for f in *.{mp4,mov}; do
    # 检查文件是否存在(防止没有匹配到文件时报错)
    [ -e "$f" ] || continue

    # 获取文件大小(单位:字节)
    filesize=$(stat -f%z "$f")

    # 100M = 100 * 1024 * 1024 = 104857600 字节
    if [ "$filesize" -gt 104857600 ]; then
        echo "正在压缩大文件: $f (大小: $(du -h "$f" | cut -f1))"

        # 执行压缩命令
        # ${f%.*} 会提取不带后缀的文件名
        ffmpeg -i "$f" -stats -vcodec libx264 -crf 28 -preset veryfast "${f%.*}_compressedByffmpeg.mp4"
    else
        echo "跳过小文件: $f"
    fi
done

# 自动删除原始大文件(可选),避免循环压缩新文件
for f in *.{mp4,mov}; do
    # 检查文件是否存在
    [ -e "$f" ] || continue

    # 排除已经是压缩后的文件,防止死循环
    if [[ "$f" == *"_compressedByffmpeg"* ]]; then
        continue
    fi

    # 获取文件大小
    filesize=$(stat -f%z "$f")

    # 100M 阈值
    if [ "$filesize" -gt 104857600 ]; then
        echo "正在压缩并替换: $f"

        output="${f%.*}_compressedByffmpeg.mp4"

        # 执行压缩,成功后执行 rm 删除原文件
        ffmpeg -i "$f" -stats -vcodec libx264 -crf 28 -preset veryfast "$output" && rm "$f"

        if [ $? -eq 0 ]; then
            echo "完成:$f 已删除,新文件为 $output"
        else
            echo "错误:$f 压缩失败,原文件已保留"
        fi
    else
        echo "跳过小文件: $f"
    fi
done
shortcuts of macOS
- Option + </> : 快速移动(iterm 如果输出 DC 在 iterm 设置的 profiles -> keys -> 绑定)
- Ctrl + a / e : 快速移动到行首/行尾
- Ctrl + u / k : 删除光标前/后内容
GIT
拉其他分支的特定文件到当前分支
			git show <branch_source>:scripts/launch_sync.py > scripts/launch_sync.py

# 如果使用
git checkout <branch_source> -- scripts/launch_sync.py
# 会直接放入暂存区,无法restore
			git show <branch_source>:scripts/launch_sync.py > scripts/launch_sync.py

# 如果使用
git checkout <branch_source> -- scripts/launch_sync.py
# 会直接放入暂存区,无法restore
HERAD/Index(暂存区)/工作区
			# 工作区恢复
git restore --source=HEAD <file>

# 暂存区恢复,但是工作区不变
git restore --staged <file>
			# 工作区恢复
git restore --source=HEAD <file>

# 暂存区恢复,但是工作区不变
git restore --staged <file>
AutoDL 磁盘空间排查与管理
🚀 AutoDL 磁盘空间管理实战手册
1. 深度扫描:找出"账目对不上"的文件
当 du -sh * 统计结果远小于磁盘占用时,通常是因为隐藏文件(以 . 开头)在作祟。
- 全量统计(含隐藏文件):
du -sh .[!.]* * | sort -rhdu -sh .[!.]* * | sort -rh .[!.]*: 精准匹配隐藏文件,同时排除.(当前目录) 和..(父目录),防止死循环统计。sort -rh: 按文件大小(Human-readable)从大到小排列。
2. 空间腾挪:使用软链接(Symbolic Link)
当系统盘(/)爆满,而数据盘(autodl-fs 或 autodl-tmp)尚有余量时,利用"传送门"无感迁移数据。
- 操作三部曲:
			mv [原路径] [目标大磁盘路径] # 1. 移动物理文件
ln -s [目标大磁盘路径] [原路径] # 2. 建立软链接
ls -l [原路径] # 3. 验证(看到 -> 符号即成功)
mv [原路径] [目标大磁盘路径] # 1. 移动物理文件 ln -s [目标大磁盘路径] [原路径] # 2. 建立软链接 ls -l [原路径] # 3. 验证(看到 -> 符号即成功) - 注意:往原路径存东西,物理上会直接写入大磁盘,不占系统盘空间。
3. 撤销迁移:将文件"复位"
如果你想取消链接并搬回文件,切记不可直接 mv,需先断开链接。
- 操作步骤:
			rm [原路径链接名] # 1. 仅删除快捷方式(不伤数据)
mv [目标大磁盘路径] [原路径] # 2. 搬回物理文件
rm [原路径链接名] # 1. 仅删除快捷方式(不伤数据) mv [目标大磁盘路径] [原路径] # 2. 搬回物理文件
4. 深度学习环境常见的"空间刺客"
在统计结果中,这两个目录通常是导致磁盘爆满的元凶:
~/.cache/: 存放 Hugging Face 模型下载、PIP 安装包缓存。~/.local/: 存放用户级安装的 Python 包(site-packages)、Jupyter 内核数据以及 W&B (Weights & Biases) 的运行日志。- 清理 W&B 缓存示例:
wandb artifact cache cleanup 1GBwandb artifact cache cleanup 1GB
5. Git 忽略策略:ckpt/ vs ckpt/*
在 .gitignore 中管理大文件上传:
ckpt/: 彻底忽略整个文件夹,Git 完全不追踪。ckpt/*: 忽略文件夹下的内容,但保留文件夹本身。配合.gitkeep使用可实现在仓库中保留空目录结构。